
Unique Twist on the Traditional Batard Bread: A Culinary Adventure in Baking 🥖🌟👩🍳
1. Introduction
The quest for the perfect loaf of bread often leads us back to the basics. But sometimes, it’s those unique, unexpected additions that transform a simple recipe into something truly special. This article explores a delightful variation on the traditional batard bread, a French loaf cherished for its elongated shape and irresistibly crispy crust. If you’re yearning for unique bread recipes that break the mold, this fresh take on the classic batard bread recipe will guide you through crafting a loaf that’s both comfortably familiar and excitingly different. Whether you’re a seasoned baking aficionado or just dipping your toes into the world of homemade bread, get ready to embark on a culinary adventure. The reward? A homemade batard bread sure to impress your family, friends, and even yourself!
2. Understanding Batard Bread
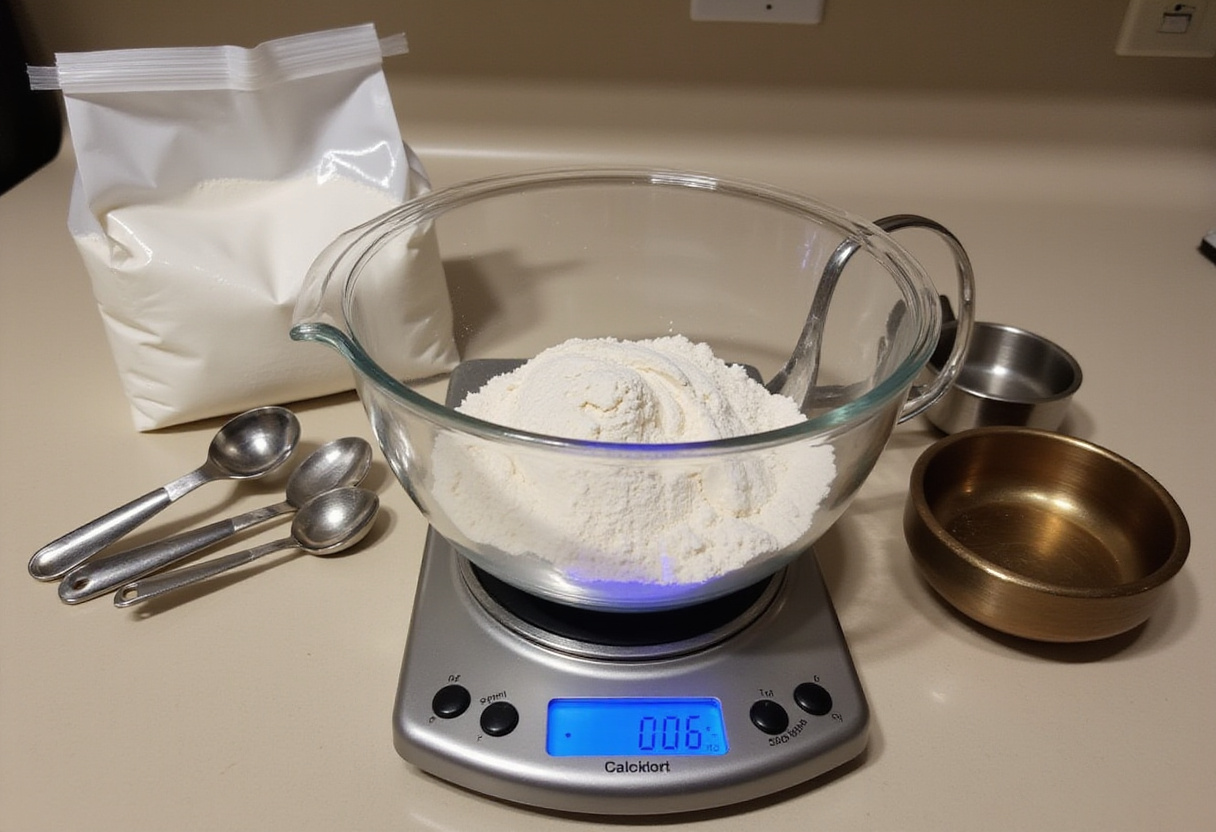
Before we dive headfirst into the unique twist that makes this recipe stand out, it’s essential that we understand the solid foundation upon which it’s built: the traditional batard recipe. What exactly *is* a batard? Simply put, it’s a loaf of bread that finds itself comfortably nestled between a baguette and a boule in terms of both shape and size. This makes it incredibly versatile! Known for its adaptable nature, a batard is perfect for everything from hearty sandwiches and crispy toast to simply enjoying with a generous smear of creamy butter. The true beauty of making homemade batard bread lies in its inherent simplicity. At its core, you only need flour, water, yeast, and salt. These are the key ingredients that come together to create something magical. However, don’t underestimate the importance of technique! And of course, the quality of your ingredients will play a significant role in shaping the final, delectable product. This is where the artistry of baking truly shines.
3. Key Ingredients and Their Roles
Let’s break down those essential ingredients and explore the unique roles they play:
- Flour: Ah, flour, the backbone of virtually any bread! It provides the crucial structure and satisfying texture that we expect from a good loaf. For a chewy, well-risen batard, bread flour, with its higher protein content, is undoubtedly the ideal choice.
- Water: Water acts as the hydrating agent, working to activate the gluten within the flour. This activation is what allows the dough to properly come together, forming that essential network of gluten that gives bread its characteristic elasticity.
- Yeast: Here, we have the leavening agent, the magical ingredient responsible for the bread’s rise and delightfully airy texture. Without yeast, our bread would be dense and unappealing!
- Salt: Don’t underestimate the power of salt! It does much more than simply add flavor. Salt plays a vital role in controlling the yeast’s activity, as well as enhancing the overall flavor profile of the bread. It also contributes to strengthening the gluten structure, resulting in a more robust and satisfying loaf.
4. The Unique Twist: Adding Flavor and Texture
Now, for the part you’ve been waiting for… the exciting twist that sets this recipe apart from the standard fare! This special batard bread recipe involves carefully incorporating unexpected ingredients that work synergistically to enhance both the flavor and texture of the loaf in delightful ways. Consider adding one or more of the following:
- Herbs: Fresh or dried, herbs like rosemary, thyme, or oregano can infuse the loaf with wonderfully aromatic notes, turning a simple bread into a sensory experience.
- Cheese: A generous sprinkle of grated Parmesan or Gruyère adds a savory depth and richness that’s simply irresistible. Imagine the slightly nutty, salty notes mingling with the subtle sweetness of the bread!
- Seeds: For a delightful crunch and nutty flavor, consider incorporating sesame, poppy, or sunflower seeds into your dough. These add textural complexity that will keep you coming back for more.
- Spices: A pinch of garlic powder or smoked paprika can be used to create a more complex and intriguing flavor profile. Experiment with different spices to find your perfect blend!
5. Step-by-Step Recipe: Crafting Your Batard Masterpiece
1. Preparing the Dough
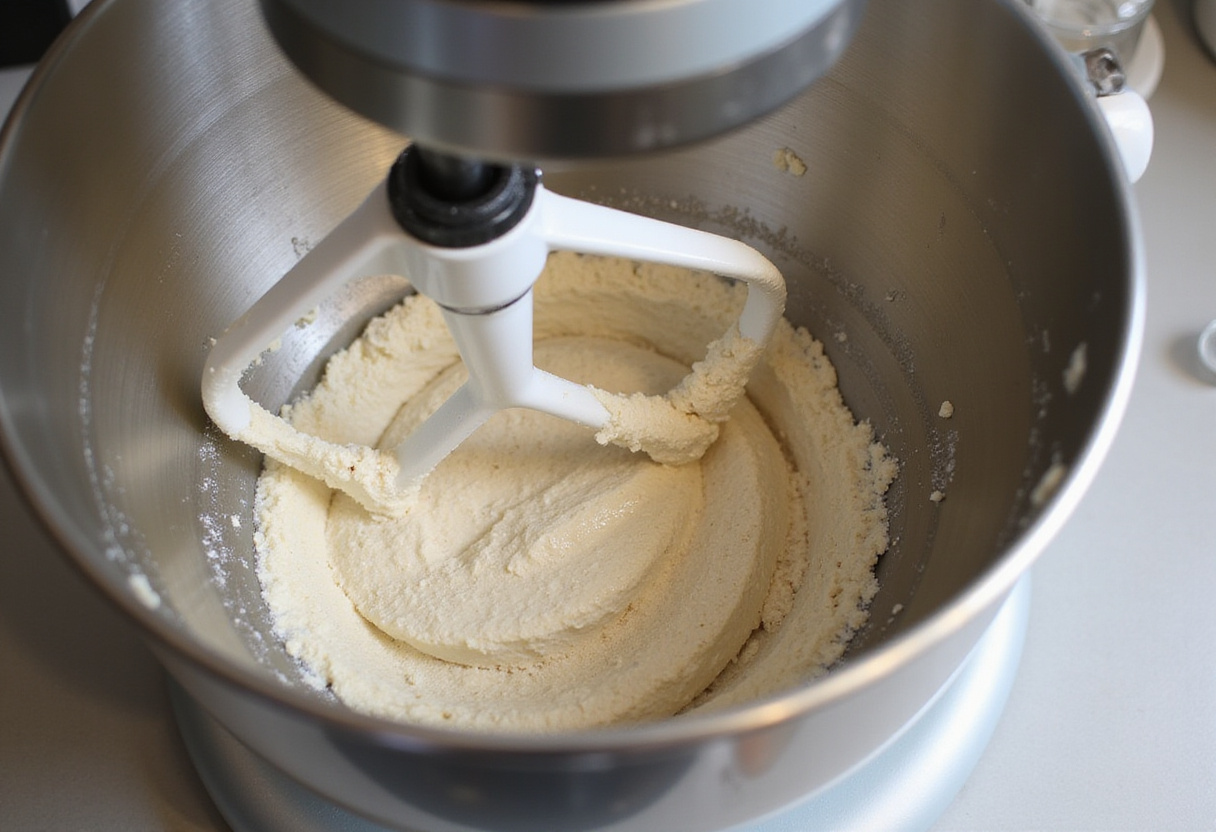
Let’s get started! In a generously sized bowl, combine the flour, yeast, salt, and any dry flavor additions you’ve chosen (such as herbs, spices, or seeds). Gradually add water while mixing. Continue until a shaggy dough begins to form. Now comes the satisfying part: kneading! Knead the dough for approximately 8-10 minutes, either by hand on a lightly floured surface, or using the dough hook attachment on your stand mixer. Continue kneading until the dough transforms into a smooth and elastic ball. If you’re incorporating cheese, knead it in gently during the last few minutes of the kneading process to ensure it’s evenly distributed.
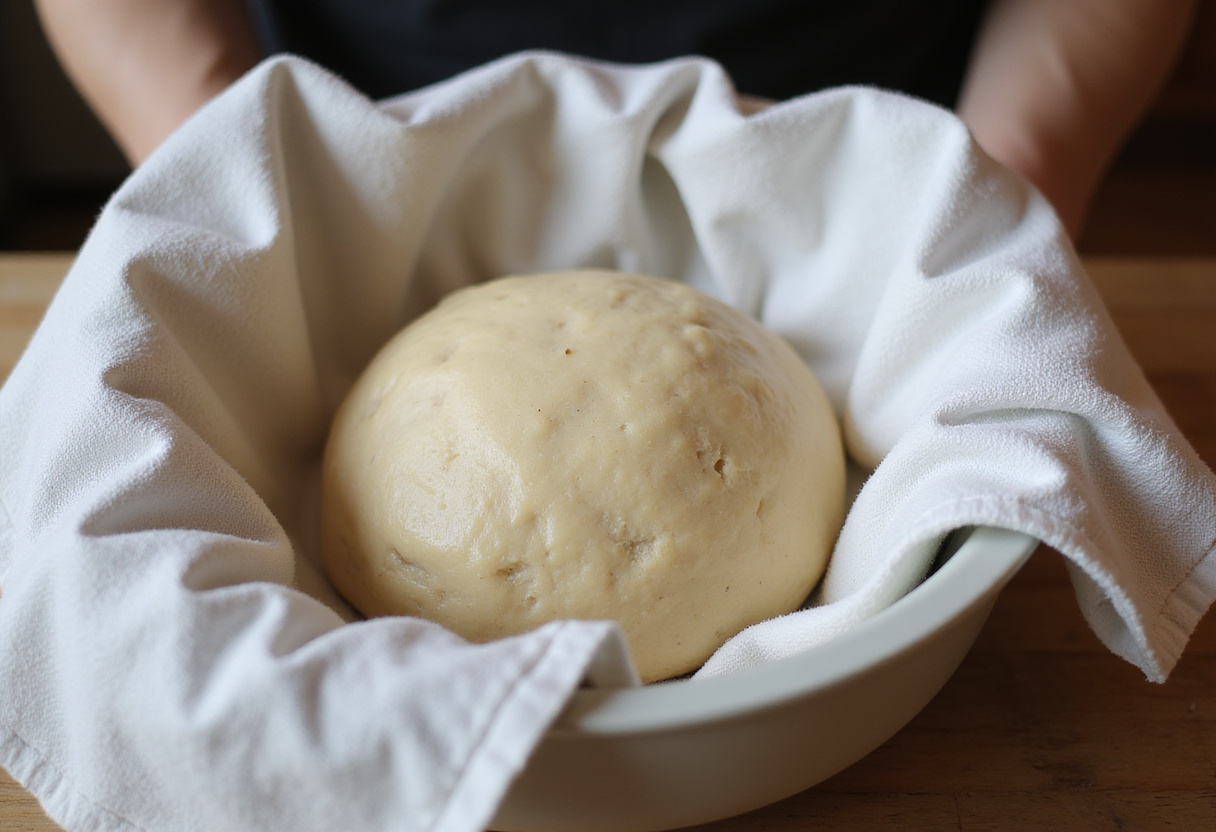
2. Proofing the Dough
Now it’s time for the dough to rest and rise. Place the dough in a lightly oiled bowl, turning it gently to ensure the entire surface is coated. Cover the bowl snugly with plastic wrap to prevent the dough from drying out. Let it rise in a warm place for approximately 1 to 1.5 hours, or until it has doubled in size. This crucial step allows the yeast to work its magic, creating the airy and light texture that we all crave in a perfectly baked homemade batard bread. Be patient – this step is essential!
3. Shaping and Second Proof
Once the dough has doubled, gently punch it down to release the trapped air. This step helps to even out the dough’s texture and prepare it for shaping. Turn the dough out onto a lightly floured surface to prevent sticking. Gently shape the dough into an elongated oval, carefully tapering the ends to achieve that characteristic batard shape. Place the shaped batard on a baking sheet that has been lined with parchment paper. This prevents the bread from sticking and makes for easy cleanup. Cover the loaf loosely with plastic wrap and let it rise for another 30-45 minutes. This second proof allows the dough to relax and further develop its airy texture.
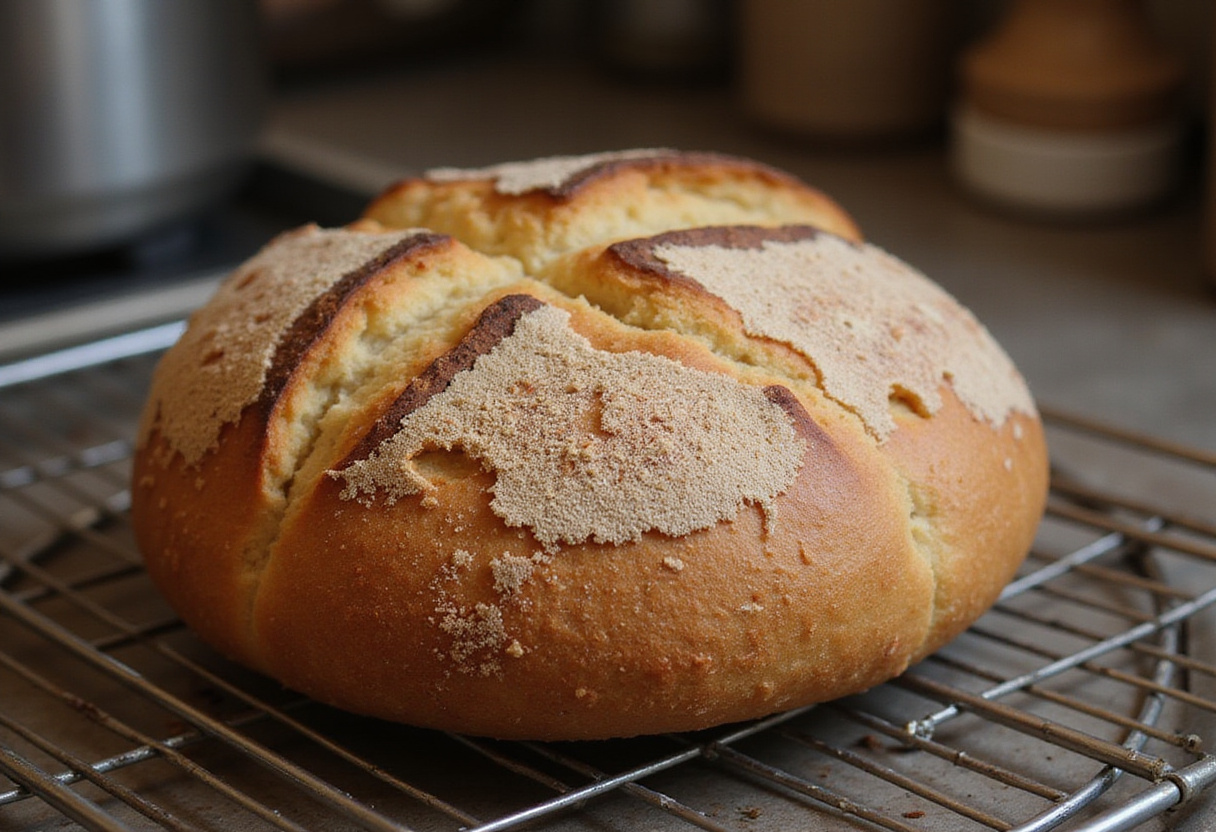
4. Baking to Perfection
As the final proof comes to an end, preheat your oven to a precise 450°F (232°C). This high temperature is essential for creating that beautiful, crispy crust. Just before placing the batard in the oven, use a sharp knife or a baker’s lame to make a few diagonal slashes across the top of the loaf. These slashes not only add visual appeal, but also allow the bread to expand properly during baking, preventing it from cracking unevenly. Bake the batard for 25-30 minutes, or until the crust is a deep golden brown and the internal temperature registers between 200-210°F (93-99°C) when measured with a digital thermometer. Once baked, transfer the batard bread recipe loaf to a wire rack and allow it to cool completely before slicing and serving. This cooling period is crucial, as it allows the crumb to set properly, resulting in a more enjoyable eating experience.. For more ideas, check out this guide.

6. Tips for the Perfect Batard
Want to take your batard baking skills to the next level? Here are some expert tips to help you achieve bread perfection:
- Use a Baking Stone: For an extra crispy crust that will have everyone raving, bake your batard on a preheated baking stone. The stone helps to distribute heat evenly and creates a delightful crusty texture.
- Steam is Key: To further enhance that crispy crust, introduce steam into the oven during the first few minutes of baking. You can easily achieve this by spraying water into the oven using a spray bottle, or by placing a pan of hot water on the bottom rack of the oven.
- Don’t Overknead: Overkneading the dough can result in a tough and dense loaf. Aim for a smooth and elastic dough that springs back gently when pressed.
- Cool Completely: We know it’s tempting to slice into that warm, fragrant loaf right away, but resist the urge! Allowing the bread to cool completely on a wire rack allows the crumb to set properly, resulting in a better texture and flavor.
7. Serving Suggestions
One of the best things about a traditional batard recipe, especially when you add your own unique twists, is its incredible versatility. This bread pairs beautifully with a wide range of dishes, making it a perfect addition to any meal. Serve it alongside hearty soups and vibrant salads for a satisfying lunch or dinner. It also makes an excellent accompaniment to your favorite main courses, adding a touch of homemade goodness to the table. Of course, a batard also serves as a fantastic base for sandwiches, bruschetta, or crostini, providing the perfect canvas for your culinary creations. The possibilities are truly endless!
8. Exploring More Unique Bread Recipes
Has this batard bread adventure sparked your interest in discovering even more unique bread recipes? Don’t let the journey end here! There’s a whole world of bread baking waiting to be explored. Delve into other fascinating variations, such as tangy sourdough batards, wholesome whole wheat batards, or even sweet batards studded with dried fruits and crunchy nuts. Remember, baking bread is a learning journey, so embrace the process of experimentation and discovery! Keep trying new things, and you’ll undoubtedly uncover exciting new flavors and techniques that will elevate your baking skills to new heights.
9. Conclusion
Crafting a homemade batard bread is a deeply rewarding experience, and the simple act of adding your own unique twist can elevate it from ordinary to extraordinary. This batard bread recipe provides a solid and reliable foundation, but remember to embrace your creativity and feel free to experiment with a variety of flavors and textures to create a loaf that truly reflects your personal taste. So, preheat your oven, gather your ingredients, and prepare to embark on a baking adventure that will fill your home with the comforting and delightful aroma of freshly baked bread. And if you want to know more about us, don’t hesitate to visit our website!
Print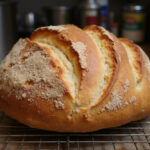
Unique Twist on the Traditional Batard Bread
- Total Time: 1 hour 50 minutes
- Yield: 1 batard 1x
- Diet: Vegetarian
Description
Discover a delightful variation on traditional batard bread that elevates the classic French loaf with unique flavors and textures. Perfect for sandwiches or simply enjoying fresh with butter.
Ingredients
- 3 cups bread flour
- 1 1/2 cups water, lukewarm
- 1 packet (2 1/4 tsp) active dry yeast
- 1 tsp salt
- Optional: chopped herbs (rosemary, thyme, oregano)
- Optional: grated cheese (Parmesan, Gruyère)
- Optional: seeds (sesame, poppy, sunflower)
- Optional: spices (garlic powder, smoked paprika)
Instructions
- In a large bowl, mix flour, yeast, salt, and any dry flavor additions.
- Gradually add water, mixing until a shaggy dough forms.
- Knead the dough for 8-10 minutes until smooth and elastic.
- Place the dough in an oiled bowl, cover, and let it rise for 1-1.5 hours or until doubled.
- Punch down the dough, shape it into an elongated oval, and place on a parchment-lined baking sheet.
- Let it rise for another 30-45 minutes.
- Preheat the oven to 450°F (232°C) and slash the top of the batard.
- Bake for 25-30 minutes until golden brown and internal temperature is 200-210°F (93-99°C).
- Cool on a wire rack before slicing.
Notes
- For a crispy crust, bake on a preheated baking stone.
- Introduce steam in the oven for the first few minutes for a better rise.
- Avoid overkneading to prevent a tough loaf.
- Allow the bread to cool completely before slicing.
- Prep Time: 20 minutes
- Cook Time: 30 minutes
- Category: Bread
- Method: Baking
- Cuisine: French
Nutrition
- Serving Size: 1 slice
- Calories: 150 Kcal
- Sugar: 0g
- Sodium: 200mg
- Fat: 2g
- Saturated Fat: 0g
- Unsaturated Fat: 1g
- Trans Fat: 0g
- Carbohydrates: 30g
- Fiber: 2g
- Protein: 5g
- Cholesterol: 0mg