
Quick Bread Machine Recipe Book: Bakery-Quality Bread at Home 🍞🏡📖
1. Introduction
Imagine waking up to the irresistible aroma of freshly baked bread, a scent so delightful it rivals any bakery. With the magic of a bread machine and the right bread machine recipes, this isn’t just a fantasy – it’s your soon-to-be reality. This guide isn’t just a collection of recipes; it’s your passport to creating delicious, homemade bread with minimal effort. We’re diving deep into the world of easy bread machine recipes that cater to everyone, from the experienced baker looking for convenience to the complete novice eager to avoid complicated techniques. These recipes will unlock the full potential of your bread machine, allowing you to consistently enjoy the taste and texture of perfect, freshly baked bread. Check out some delicious options for breakfast and brunch featuring your new bread!
This isn’t just about convenience; it’s about reclaiming control over your ingredients and enjoying bread that’s truly tailored to your tastes. This bread maker recipe book emphasizes quick and simple recipes, perfectly suited for busy individuals and families who crave homemade goodness without the hours of painstaking labor. From the comforting simplicity of classic white bread to the satisfying complexity of flavorful multigrain loaves, these homemade bread machine recipes offer something to tantalize every palate. It’s time to say goodbye to the often-bland and preservative-laden store-bought bread and embrace the delightful experience of creating your own bakery-worthy masterpieces right in your kitchen!
2. Understanding Your Bread Machine
Before you dive headfirst into the exciting world of bread machine recipes, it’s absolutely crucial to take a moment to understand the nuances of your particular bread machine. Not all machines are created equal! Different models boast a wide array of settings, including pre-programmed options for various loaf sizes, crust color preferences (light, medium, dark), and settings designed specifically for different types of bread, such as whole wheat, French bread, or even sweet doughs. So, dust off that manual! Consult your machine’s user guide to thoroughly familiarize yourself with all these settings and, most importantly, understand how each one affects the final outcome of your bread. Properly understanding your machine will enable you to fine-tune those easy bread machine recipes to perfectly match your individual taste and achieve consistent, delicious results every single time you bake.
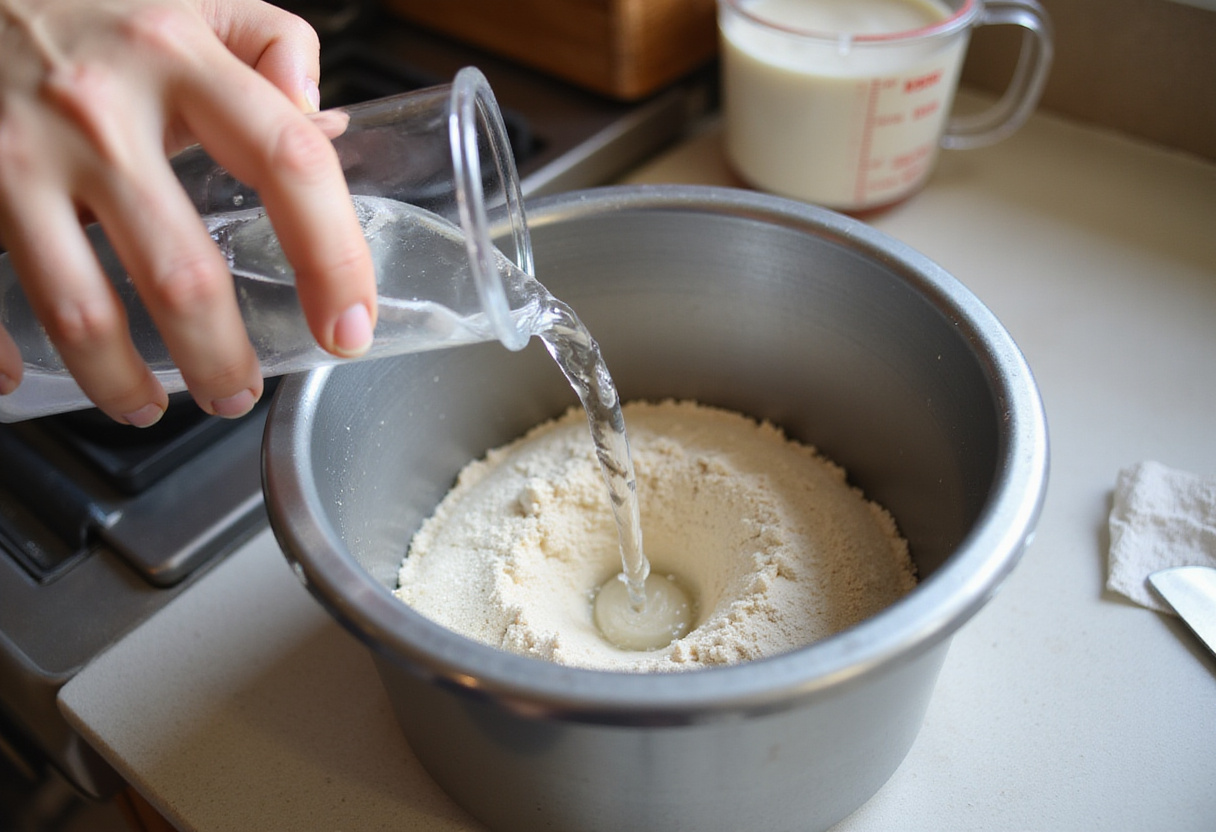
One of the most critical aspects of using a bread machine is the order in which you add the ingredients to the pan. While it might seem trivial, this order is vital for proper yeast activation and consistent bread quality. The vast majority of bread machines recommend adding liquids first (water, milk, etc.), followed by the dry ingredients (flour, sugar, salt). The yeast is almost always added last, and it’s often recommended to create a small well in the center of the dry ingredients to keep the yeast separated from the wet ingredients until the mixing process actually begins. This prevents premature activation of the yeast and ensures that it’s evenly distributed throughout the dough, leading to optimal rising and a beautifully textured loaf from your homemade bread machine recipes. Also consider trying some dinner ideas with your fresh bread!
3. Essential Ingredients for Bread Machine Recipes
The quality of the ingredients you use will significantly impact the final product of your bread maker recipe book creations. Just like a master chef uses the finest ingredients, you should ensure your pantry is stocked with the best for your bread machine adventures. Here’s a closer look at some essential ingredients to always keep on hand:
- Flour: When it comes to bread, flour is the foundation. Bread flour is generally considered the gold standard for most bread machine recipes. Its higher gluten content provides the necessary structure and that delightful chewiness we all crave in a good loaf of bread. All-purpose flour can be used as a substitute in a pinch, but be aware that the resulting texture may be noticeably different, often being a bit softer and less chewy.
- Yeast: Yeast is the leavening agent that makes your bread rise to its fluffy potential. Instant yeast, also known as bread machine yeast, is highly recommended for its reliability and convenience. Unlike active dry yeast, instant yeast doesn’t require proofing before being added to the bread machine. It’s important to make sure your yeast is fresh. Expired yeast will struggle to activate, resulting in a dense, flat loaf.
- Liquids: Water is most commonly used, but don’t underestimate the impact of other liquids! Milk adds richness and a softer crumb, and combinations of water and milk can create unique flavor profiles. The temperature of the liquid is absolutely critical. It should be warm, ideally around 105-115°F (40-46°C). This temperature range activates the yeast, encouraging it to do its job. However, be extremely careful not to use liquid that’s too hot, as excessive heat can kill the yeast and prevent your bread from rising.
- Sweeteners: Sugar is a common choice, but don’t limit yourself! Honey, maple syrup, molasses, or even agave nectar can be used to add sweetness and complexity to your bread. These sweeteners not only enhance the flavor but also provide food for the yeast, further aiding in the rising process.
- Fats: Butter is a classic choice, lending a rich, melt-in-your-mouth quality to the bread. Oil, such as olive oil or vegetable oil, adds moisture and a subtle flavor. Shortening provides tenderness and a slightly different texture. Experiment with different fats to discover your favorite flavor profiles.
- Salt: Don’t skip the salt! Salt plays a far more crucial role than just adding salty flavor. It acts as a regulator, controlling the activity of the yeast and preventing it from rising too quickly. Salt also tightens the gluten structure, contributing to the overall texture of the bread and enhancing its flavor.
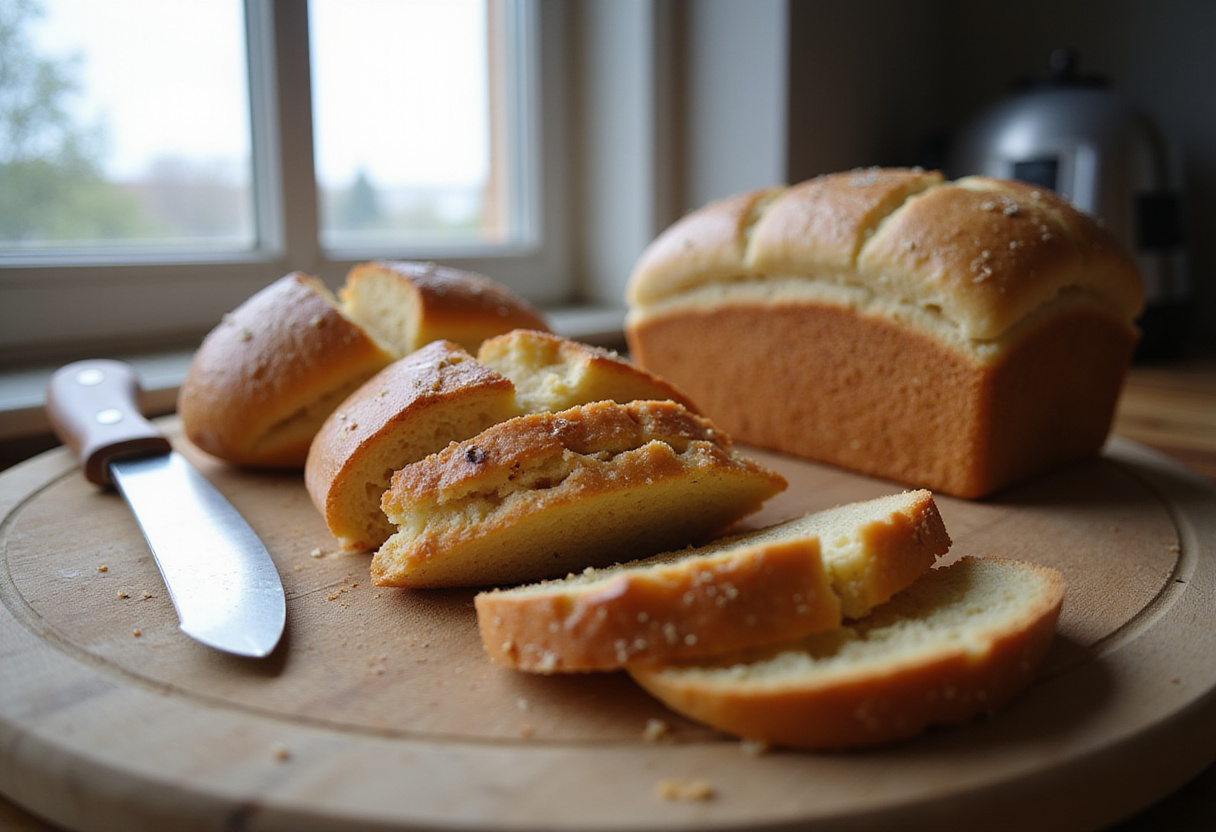
4. Recipe 1: Classic White Bread
This classic white bread recipe is an absolute essential, a cornerstone in any collection of bread machine recipes. It’s incredibly simple, remarkably versatile, and yields a soft, delightfully textured loaf that’s simply perfect for everything from sandwiches and toast to serving alongside your favorite appetizers and snacks. Enjoying it plain is also a real treat!
Ingredients:
- 3 cups bread flour
- 1 1/4 cups warm water
- 1 1/2 teaspoons salt
- 1 tablespoon sugar
- 2 tablespoons butter, melted
- 2 1/4 teaspoons instant dry yeast
Instructions:
- Add the warm water to the bread machine pan.
- Add the melted butter, salt, and sugar.
- Pour in the bread flour, ensuring it completely covers the liquid ingredients. This helps to prevent the yeast from activating too early.
- Make a small well in the center of the flour, creating a little nest for the yeast. Then, carefully add the instant dry yeast into the well.
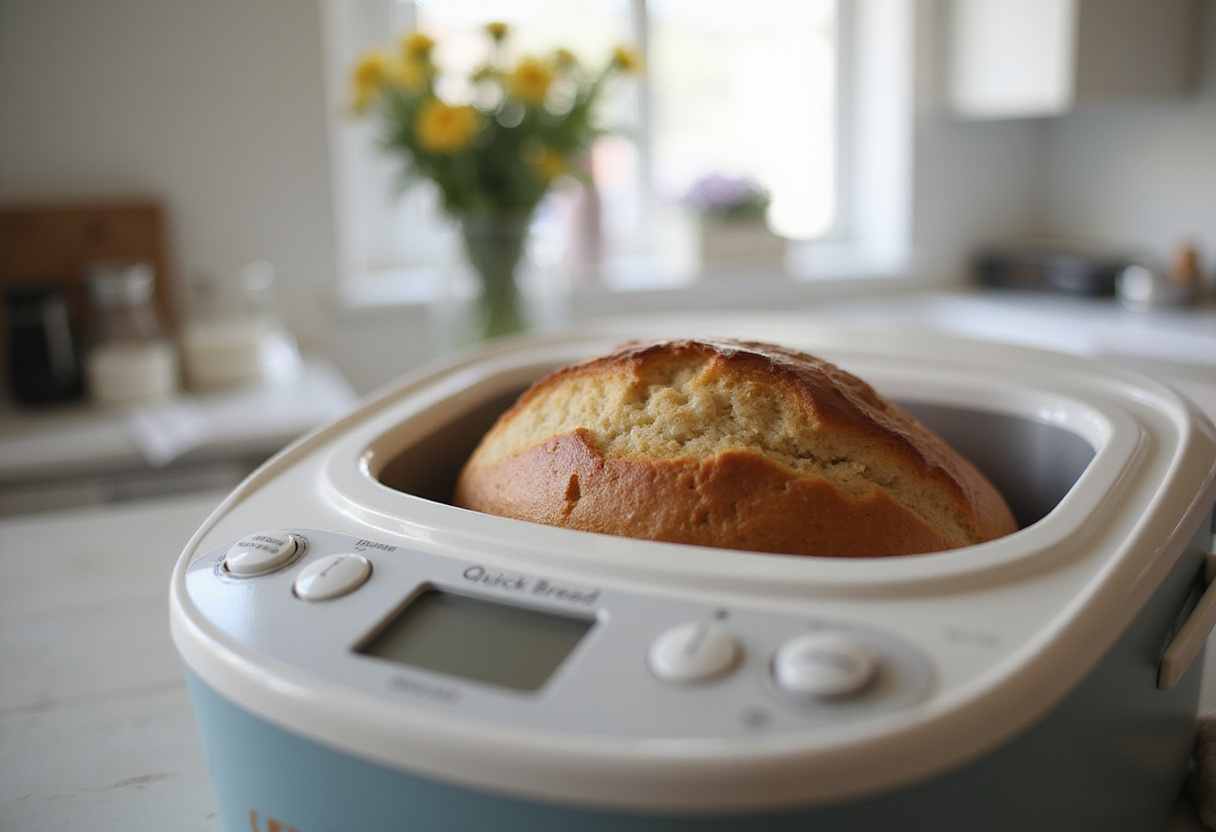
- Select the “Basic” or “White Bread” setting on your bread machine. If your machine allows, choose your desired crust color (light, medium, or dark) and loaf size (usually 1.5 or 2 pounds).
- Press the start button, and let the bread machine work its magic! The machine will handle the entire process, from kneading and rising to baking.
- Once the cycle is complete, use oven mitts to carefully remove the bread pan from the machine. Turn the pan upside down and gently shake or tap it to release the loaf. Be careful, as the pan and loaf will be very hot.
- Place the freshly baked loaf on a wire rack and allow it to cool completely before slicing. This is crucial for preventing a gummy texture and ensuring clean, even slices.
5. Recipe 2: Honey Wheat Bread
If you’re looking for a bread that’s both subtly sweet and packed with wholesome goodness, this honey wheat bread is an excellent choice. It’s a truly delightful addition to any bread maker recipe book, offering a wonderful and satisfying balance of flavors and textures. Perfect toasted for breakfast, served alongside a hearty soup, or used to create delicious and healthy sandwiches.
Ingredients:
- 2 cups bread flour
- 1 cup whole wheat flour
- 1 1/4 cups warm water
- 2 tablespoons honey
- 2 tablespoons olive oil
- 1 1/2 teaspoons salt
- 2 1/4 teaspoons instant dry yeast
Instructions:
- Pour the warm water into the bread machine pan.
- Add the honey and olive oil to the water. The honey will dissolve more easily in the warm water.
- In a separate bowl, combine the bread flour and whole wheat flour. This ensures that the flours are evenly distributed throughout the dough. Add the flour mixture to the pan on top of the liquid ingredients.
- Add the salt into one corner of the pan. This helps to keep the salt separate from the yeast until the mixing process begins.
- Make a small well in the center of the flour mixture, just like in the previous recipe. Add the instant dry yeast into the well.
- Select the “Whole Wheat” or “Basic” setting on your bread machine, depending on what’s available. The “Whole Wheat” setting is designed for heavier doughs and will usually have a longer kneading and rising time.
- Choose your desired crust color and loaf size, then press the start button to begin the baking cycle.
- Once the baking cycle is complete, carefully remove the bread pan from the machine. Turn the pan upside down and gently shake or tap to release the loaf.
- Place the freshly baked loaf on a wire rack and allow it to cool completely before slicing. This will prevent the bread from becoming gummy and make it easier to slice evenly.
6. Recipe 3: French Bread
Are you craving the rustic charm and satisfying crunch of authentic French bread? This easy bread machine recipe makes it surprisingly simple to create a truly delightful loaf right in your own kitchen! The bread machine handles the majority of the work, delivering a loaf with a beautifully crisp, golden crust and a soft, airy interior that’s perfect for dipping in olive oil, serving alongside cheese, or using as a base for delicious bruschetta.
Ingredients:
- 3 cups bread flour
- 1 1/4 cups warm water
- 1 1/2 teaspoons salt
- 1 tablespoon sugar
- 1 tablespoon olive oil
- 2 1/4 teaspoons instant dry yeast
Instructions:
- Add the warm water to the bread machine pan.
- Add the olive oil, sugar, and salt to the water.
- Pour the bread flour into the pan, covering the liquid ingredients.
- Create a small well in the center of the flour and add the instant dry yeast.
- Select the “French Bread” setting on your bread machine. This setting is specifically designed to create the characteristic crust and texture of French bread.
- Choose your desired crust color and loaf size, then press the start button to begin the baking cycle. Keep an eye on the bread as it approaches the end of the baking cycle. If the crust is browning too quickly, you can tent it with a piece of aluminum foil to prevent burning.
- Once the cycle is complete, carefully remove the bread pan from the machine. Turn the pan upside down and gently shake or tap it to release the loaf. The crust should be firm and golden brown.
- Place the freshly baked loaf on a wire rack and allow it to cool completely before slicing. This is particularly important for French bread, as the crust needs time to set properly. Slicing it while it’s still warm can result in a softer, less crisp crust.
7. Recipe 4: Cinnamon Raisin Bread
Prepare to indulge in the warm, comforting, and utterly irresistible flavors of homemade cinnamon raisin bread! This homemade bread machine recipe is the perfect way to start your day with a touch of sweetness, or to enjoy as a delightful afternoon treat with a cup of coffee or tea. The aroma alone is enough to make your kitchen feel cozy and welcoming. Check out some other desserts and sweets to enjoy.
Ingredients:
- 3 cups bread flour
- 1 1/4 cups warm milk
- 1/4 cup sugar
- 1 teaspoon salt
- 2 tablespoons butter, melted
- 2 1/4 teaspoons instant dry yeast
- 1 teaspoon cinnamon
- 1/2 cup raisins
Instructions:
- Add the warm milk to the bread machine pan. Using milk instead of water will give the bread a richer flavor and a softer texture.
- Add the melted butter, sugar, and salt to the milk.
- Pour in the bread flour and cinnamon. The cinnamon will infuse the entire loaf with its warm, spicy flavor.
- Create a small well in the center of the flour mixture and add the instant dry yeast.
- Add the raisins to the pan. For best results, soak the raisins in warm water for about 15 minutes before adding them to the pan. This will plump them up and prevent them from drying out during baking. Make sure to drain them well before adding them to the dough.
- Select the “Sweet Bread” or “Dough” setting on your bread machine. If your machine has a “Sweet Bread” setting, that’s the ideal choice. If not, you can use the “Dough” setting, which will knead and rise the dough but not bake it. If using the Dough setting, you’ll need to bake the loaf in a conventional oven after the cycle is complete.
- Choose your desired crust color and loaf size, then press the start button. If your machine has a fruit and nut dispenser, you can add the raisins there instead of directly into the pan. This will ensure that they are evenly distributed throughout the dough.
- Once the bread is baked (either in the bread machine or in a conventional oven), carefully remove the loaf from the pan and let it cool completely on a wire rack before slicing. This will allow the flavors to meld and the bread to firm up, making it easier to slice.
8. Tips and Tricks for Perfect Bread Machine Recipes
Want to ensure that every loaf you bake is a resounding success? Here are some essential tips and tricks to take your bread machine recipes from good to absolutely outstanding:
- Measure Accurately: Baking is a science, and precise measurements are absolutely crucial for achieving the correct consistency and texture in your bread. Invest in a good set of measuring cups and spoons, and use them carefully. Spoon the flour into the measuring cup and level it off with a knife, rather than scooping it directly from the bag, which can pack the flour and result in too much being used.
- Use Fresh Yeast: Yeast is a living organism, and its freshness directly impacts its ability to leaven the bread. Always check the expiration date on your yeast package before using it. If the yeast is expired, it will not activate properly, resulting in a dense, flat, and disappointing loaf. Store your yeast in an airtight container in the refrigerator or freezer to prolong its shelf life.
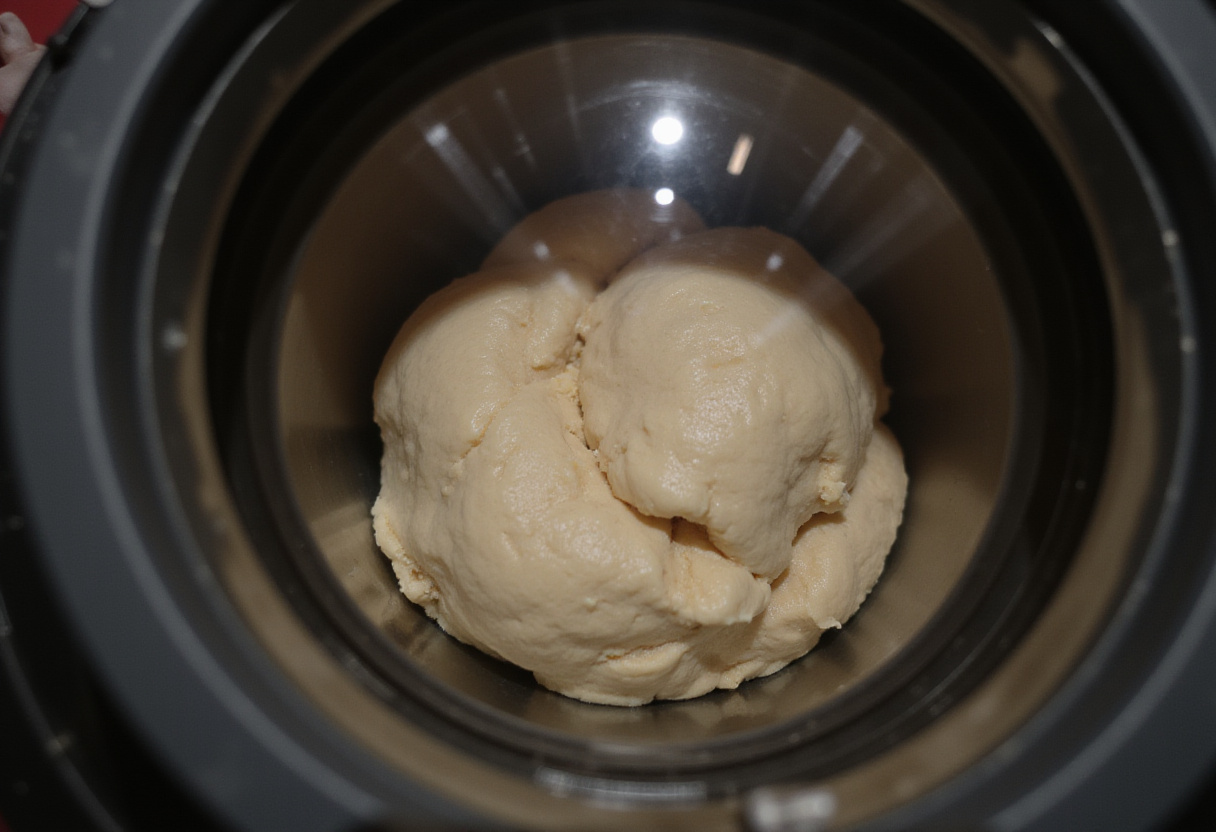
- Monitor the Dough: While the bread machine handles most of the work, it’s still a good idea to keep a close eye on the dough during the kneading process, especially during the first few minutes. The dough should form a smooth, elastic ball that pulls away from the sides of the pan. If it appears too dry and crumbly, add a little more liquid, one tablespoon at a time, until it reaches the desired consistency. If it’s too wet and sticky, add a bit more flour, one tablespoon at a time.
- Adjust for Altitude: If you live at a high altitude, the lower air pressure can cause bread to rise too quickly and then collapse. To compensate for this, you may need to reduce the amount of yeast and liquid in your easy bread machine recipes. Start by reducing the yeast by 1/4 teaspoon and the liquid by 1 tablespoon, and adjust further as needed.
- Cool Completely: This is perhaps one of the most overlooked but crucial steps. It can be incredibly tempting to slice into a warm, freshly baked loaf of bread, but resist the urge! Allowing the bread to cool completely on a wire rack before slicing is essential for preventing a gummy texture and ensuring clean, even slices. As the bread cools, the starches in the crumb firm up, making it easier to slice without squashing the loaf.
9. Conclusion
As you’ve discovered, with the right bread machine recipes and a little bit of practice, you can effortlessly create bakery-quality bread in the comfort and convenience of your own home. The possibilities are truly endless! Don’t be afraid to experiment with different ingredients, flavors, and techniques to discover your very own signature collection of homemade bread machine recipes. Get creative and add ingredients like cheese, herbs, or dried fruit! Your bread maker recipe book is more than just a collection of instructions; it’s your personal guide to unlocking the simple pleasure and immense satisfaction of freshly baked bread, made effortlessly with the help of your trusty bread machine. Happy baking! Ready to elevate your bread-making game? Looking for inspiration? You might find some hidden gems on Amazon’s Best Sellers in Bread Machine Recipes. Furthermore, if you want inspiration for dishes to eat with your bread, consider these Scalloped Potatoes for Easter Dinner, especially Delicious Scalloped Potatoes or even Quick Scalloped Potatoes! Perhaps you would like something for after the meal, like Classic Carrot Cake. Not to forget, Traditional Hot Cross Buns are also a great option.
Print
Quick Bread Machine Recipe Book That Tastes Like It’s from a Bakery
- Total Time: 3 hours 10 minutes
- Yield: 1 loaf 1x
- Diet: Vegetarian
Description
Discover the ease of making bakery-quality bread at home with our Quick Bread Machine Recipe Book. Enjoy a variety of simple and delicious bread recipes, perfect for busy lifestyles.
Ingredients
- 3 cups bread flour
- 1 1/4 cups warm water
- 1 1/2 teaspoons salt
- 1 tablespoon sugar
- 2 tablespoons butter, melted
- 2 1/4 teaspoons instant dry yeast
Instructions
- Add the warm water to the bread machine pan.
- Add the melted butter, salt, and sugar.
- Pour in the bread flour, ensuring it covers the liquid ingredients.
- Make a small well in the center of the flour and add the yeast.
- Select the ‘Basic’ or ‘White Bread’ setting on your bread machine, and choose your desired crust color and loaf size.
- Press start and let the bread machine do its magic!
- Once the cycle is complete, carefully remove the loaf from the machine and let it cool on a wire rack before slicing.
Notes
- Measure ingredients accurately for the best results.
- Use fresh yeast for optimal rising.
- Monitor dough consistency and adjust water or flour as needed.
- Allow bread to cool completely before slicing for better texture.
- Prep Time: 10 minutes
- Cook Time: 3 hours
- Category: Bread
- Method: Bread Machine
- Cuisine: Bakery
Nutrition
- Serving Size: 1 slice
- Calories: 130 Kcal
- Sugar: 1g
- Sodium: 200mg
- Fat: 3g
- Saturated Fat: 1.5g
- Unsaturated Fat: 1.5g
- Trans Fat: 0g
- Carbohydrates: 22g
- Fiber: 1g
- Protein: 4g
- Cholesterol: 5mg