High-Altitude Banana Bread Recipe: The Fluffiest, Moistest Delight! 🍌🍞🏔️
1. Introduction
Baking at high altitudes can be tricky, but fear not! This high altitude banana bread recipe is specifically crafted to ensure your loaf turns out perfectly moist, fluffy, and delicious every time. Whether you’re dealing with the challenges of lower air pressure or simply want a foolproof banana bread for altitude, this guide will walk you through each step. We understand the frustration of failed baking attempts, especially when you are at high elevations! Say goodbye to sunken centers and dry textures, and hello to the best altitude adjusted banana bread you’ve ever tasted. This recipe is designed to combat those common issues, ensuring a consistently delightful outcome.
Imagine slicing into a warm, fragrant loaf of banana bread, perfectly risen and boasting a tender crumb. That’s the promise of this carefully crafted recipe. It’s more than just a recipe; it’s a solution for bakers facing the unique challenges of high-altitude cooking. If you are looking for more baking solutions, explore our desserts and sweets section.
This high altitude banana bread recipe is your ticket to baking success. Baking doesn’t have to be a chore. With the right guidance and a few simple adjustments, you can confidently create baked goods that rival those made at sea level. Let’s embark on this baking adventure together and unlock the secrets to perfect high-altitude banana bread. We’ll start with the basics and move towards expert tips, ensuring your satisfaction every step of the way.
2. Understanding High Altitude Baking
At higher altitudes, lower air pressure affects how baked goods rise and set. Liquids evaporate more quickly, and leavening agents (like baking soda and baking powder) work more rapidly. This phenomenon can lead to a variety of baking mishaps, from dry and crumbly textures to uneven rising and collapsing centers. Without adjustments, your banana bread for altitude can end up dry, dense, or with a collapsed top. This high altitude banana bread recipe takes these factors into account, ensuring a balanced and perfectly baked loaf.
Understanding these challenges is the first step toward overcoming them. For instance, the faster evaporation of liquids can be addressed by increasing the amount of moisture in the recipe. Similarly, the rapid action of leavening agents can be counteracted by reducing their quantity. This altitude adjusted banana bread is essential for consistently great results at high elevations. Remember, successful high-altitude baking is all about adapting and compensating for the unique atmospheric conditions.
For more insights into adapting recipes, you might find our classic carrot cake recipe helpful, as it addresses similar baking challenges. You can also try this banana bread recipe made by Curly Girl Kitchen!
3. Ingredients for High Altitude Banana Bread
- 1 ½ cups all-purpose flour
- 1 teaspoon baking soda
- ½ teaspoon salt
- ½ cup (1 stick) unsalted butter, melted
- ¾ cup granulated sugar
- 2 large eggs
- 1 teaspoon vanilla extract
- 1 cup mashed ripe bananas (about 2-3 medium bananas)
- ¼ cup sour cream or plain yogurt
Each ingredient plays a vital role in achieving the perfect texture and flavor in your high-altitude banana bread. The ripe bananas contribute sweetness and moisture, while the sour cream adds richness and helps to tenderize the crumb. The balance of flour, baking soda, and salt is crucial for the bread’s structure and rise. Ensure all your ingredients are fresh and of good quality for the best results.
Consider experimenting with different types of flour or sweeteners to customize the recipe to your liking. Whole wheat flour can add a nutty flavor and boost nutritional value, while honey or maple syrup can provide a unique sweetness. Always remember to adjust the liquid content accordingly when making substitutions to maintain the perfect consistency.
4. Essential Equipment
- 9×5 inch loaf pan
- Mixing bowls
- Measuring cups and spoons
- Whisk
- Spatula
- Oven
Having the right equipment can make the baking process smoother and more enjoyable. A good quality loaf pan ensures even heat distribution, while accurate measuring tools are essential for precise ingredient ratios. A whisk is perfect for combining dry ingredients, and a spatula is ideal for gently folding wet and dry ingredients together without overmixing. And of course, a reliable oven is the heart of any baking endeavor.
Investing in high-quality baking equipment can significantly improve your baking results and make the process more efficient. Consider purchasing a set of nesting mixing bowls, a digital kitchen scale for precise measurements, and a silicone spatula that can withstand high temperatures. These tools will quickly become indispensable in your baking arsenal.
5. Step-by-Step Instructions
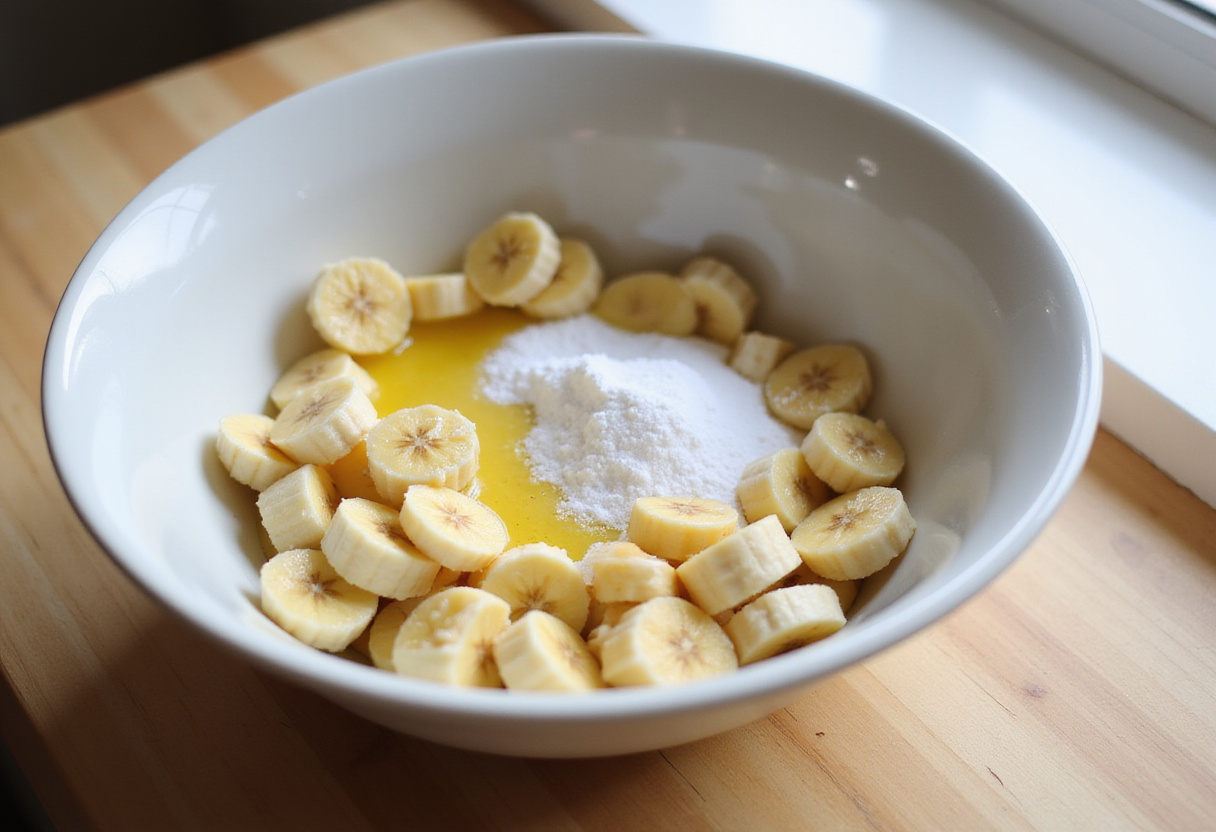
Mixing Wet Ingredients
In a large bowl, combine the melted butter and sugar. Mix well until smooth. Add the eggs one at a time, mixing after each addition. Stir in the vanilla extract and mashed ripe bananas. Finally, blend in the sour cream or yogurt. This mixture forms the base of your high altitude banana bread recipe, providing moisture and flavor that are crucial for baking at high elevations. Proper emulsification at this stage sets the foundation for a tender and evenly textured loaf.
Take your time with this step, ensuring that each ingredient is fully incorporated before adding the next. The goal is to create a smooth and homogenous mixture that will evenly distribute the moisture and flavor throughout the bread. Using a stand mixer can simplify this process, but a hand mixer or even a sturdy whisk can also get the job done. Feel free to explore our other breakfast and brunch ideas for inspiration.
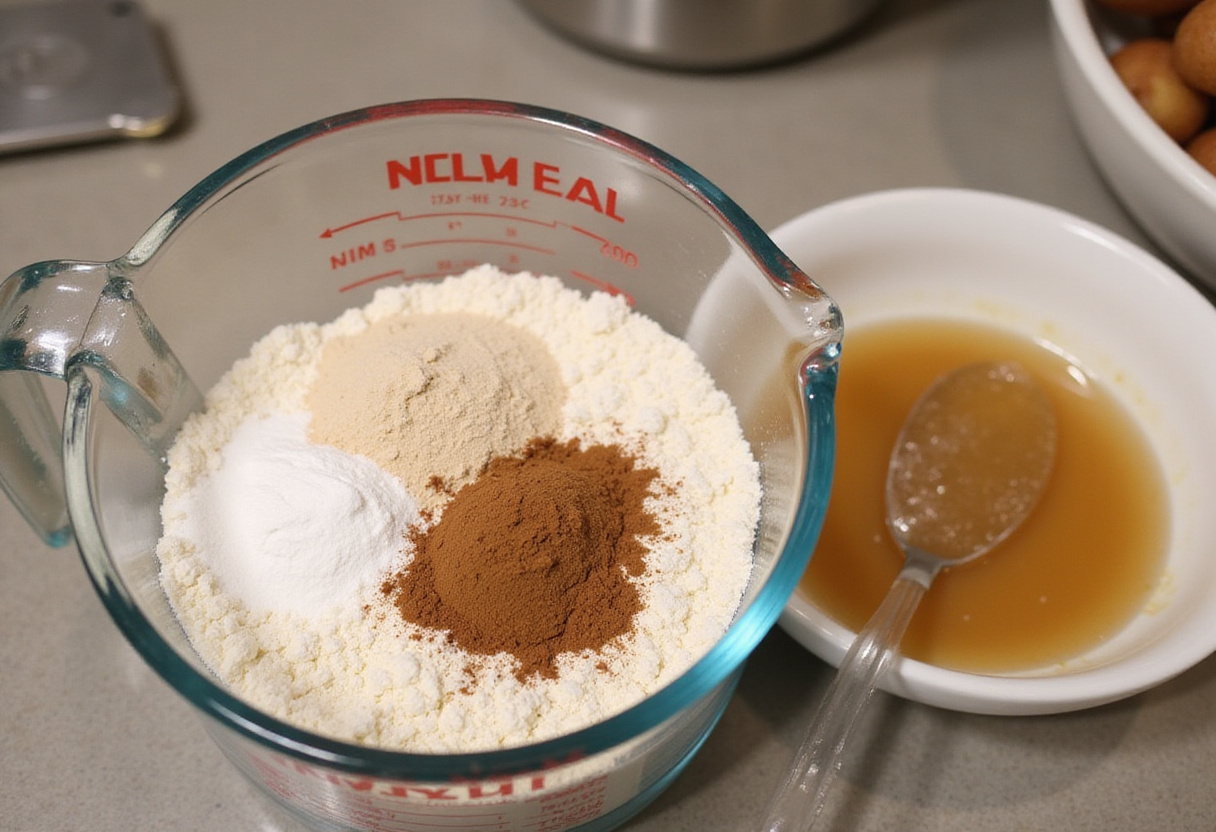
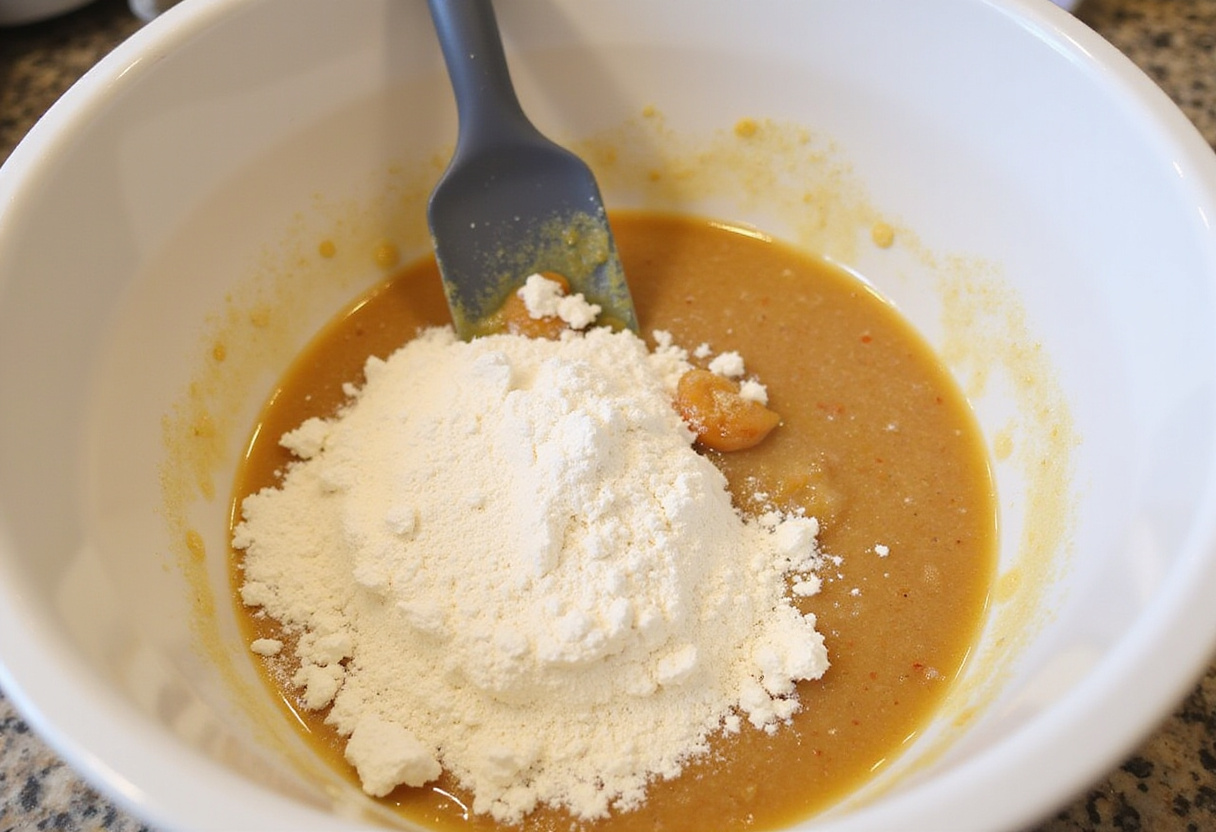
Combining Dry Ingredients
In a separate bowl, whisk together the flour, baking soda, and salt. Ensuring these ingredients are well combined helps distribute the leavening agent evenly, which is essential for a proper rise in your altitude adjusted banana bread. This step is crucial because it prevents clumps of baking soda from forming, which can result in uneven rising and pockets of air in the finished bread. For banana bread for altitude, precise measurement and thorough mixing are key.
A simple whisk is the best tool for this task, as it effectively breaks up any clumps and ensures that the dry ingredients are evenly distributed. If you don’t have a whisk, a fork can also be used. Just be sure to spend a little extra time stirring to ensure that everything is well combined. This attention to detail will pay off in the form of a beautifully risen and evenly textured banana bread.
If you are looking for the perfect side dish, try our best homemade scalloped potatoes recipe!
Mixing Wet and Dry Ingredients Together
Gradually add the dry ingredients to the wet ingredients, mixing until just combined. Be careful not to overmix, as this can lead to a tough loaf. A few streaks of flour are okay. This step is crucial in creating the perfect texture for your high altitude banana bread, ensuring it remains moist and tender, even when baked at high elevations. Overmixing develops gluten, resulting in a dense and chewy texture that is undesirable in banana bread.
The key to avoiding overmixing is to add the dry ingredients in small increments and to mix only until the flour is just incorporated. A few streaks of flour are perfectly acceptable at this stage. Using a spatula, gently fold the wet and dry ingredients together, being careful not to deflate the batter. This gentle approach will ensure a light and airy texture in your finished banana bread.
If you’re planning a special dinner, check out our scalloped potatoes for easter dinner for a delightful side dish.
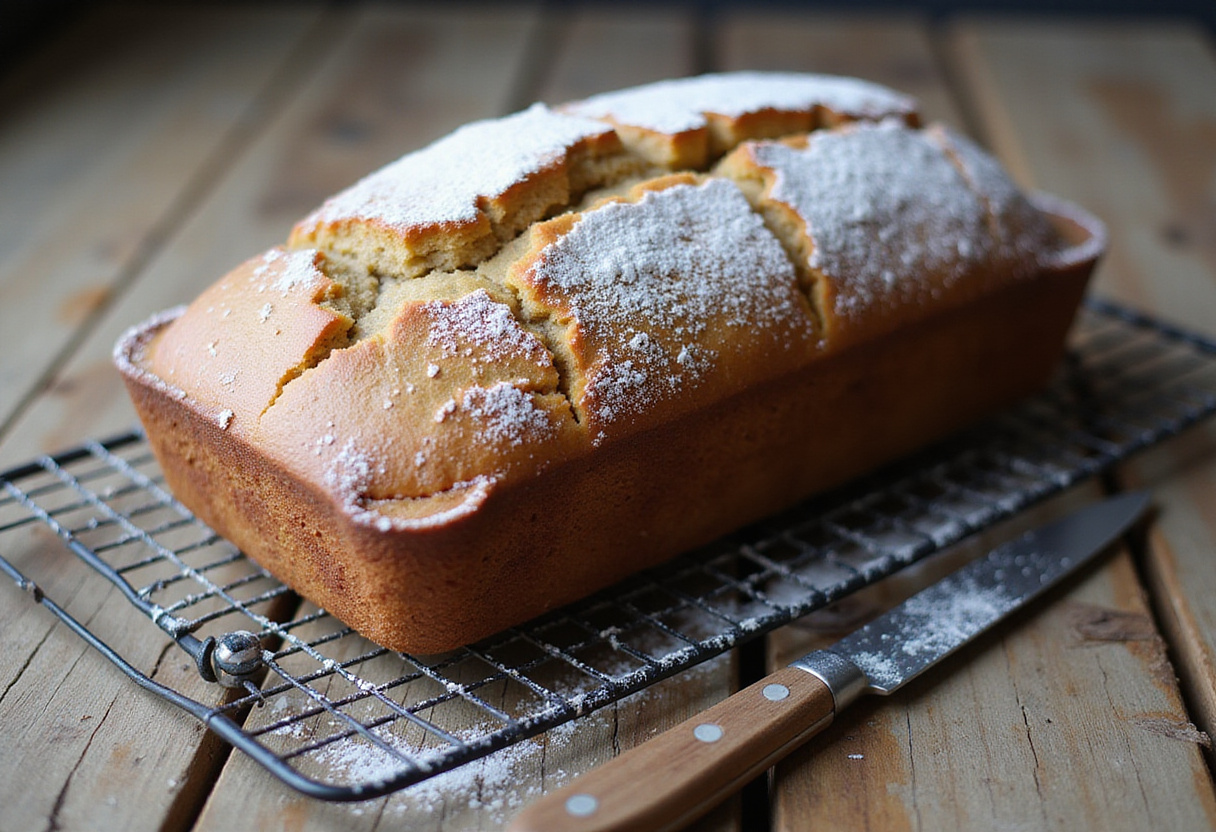
Baking the Banana Bread
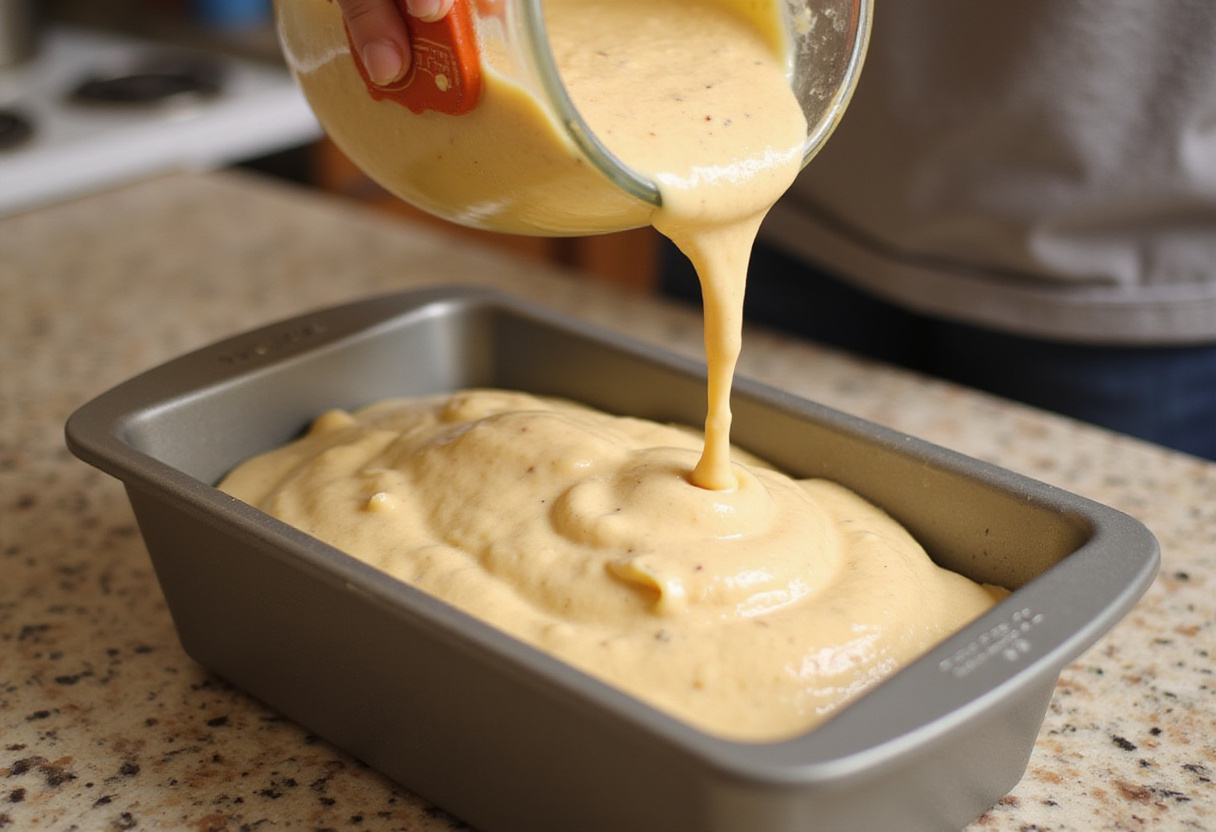
Pour the batter into the prepared loaf pan and spread evenly. Bake in the preheated oven for 50-60 minutes, or until a toothpick inserted into the center comes out clean. This is a critical step to avoid a gummy center. Let the banana bread for altitude cool in the pan for 10 minutes before transferring it to a wire rack to cool completely. This controlled baking time is especially important to prevent dryness when making an altitude adjusted banana bread. Resist the urge to slice into the warm bread immediately, as it needs time to set properly.
The toothpick test is the most reliable way to determine if the banana bread is fully baked. Insert a toothpick into the center of the loaf. If it comes out clean or with just a few moist crumbs attached, the bread is done. If it comes out with wet batter, continue baking for a few more minutes and test again. Allowing the bread to cool in the pan before transferring it to a wire rack helps it to retain its shape and prevents it from sticking to the pan. Allow it to cool down before trying our main dishes.
For a festive twist, consider making our easy carrot cake for your next celebration!
6. Tips for Perfect High Altitude Banana Bread
- Reduce Leavening: Decrease the amount of baking soda by about ¼ teaspoon to prevent the bread from rising too quickly and then collapsing. This high altitude banana bread recipe already accounts for this adjustment.
- Increase Liquid: Add an extra tablespoon or two of liquid (like milk or water) to compensate for faster evaporation. The inclusion of sour cream in this recipe aids in maintaining moisture.
- Oven Temperature: Lower the oven temperature by 25°F (15°C) to help the bread bake more evenly.
- Don’t Overmix: Overmixing develops gluten, resulting in a tougher loaf. Mix until just combined.
- Use Ripe Bananas: The riper the bananas, the more flavorful and moist your bread will be.
These tips are the secret to consistently successful high-altitude banana bread. By understanding the science behind each adjustment, you can confidently fine-tune the recipe to suit your specific altitude and oven. Don’t be afraid to experiment and make notes of your results. Baking is as much an art as it is a science, and the best way to improve is through practice and observation.
7. Variations and Add-ins
- Nuts: Add ½ cup of chopped walnuts, pecans, or almonds for added crunch.
- Chocolate Chips: Stir in ½ cup of chocolate chips for a sweeter treat.
- Spices: Enhance the flavor with a pinch of cinnamon, nutmeg, or cloves.
- Dried Fruit: Incorporate ½ cup of raisins, dried cranberries, or chopped dates.
The possibilities are endless when it comes to customizing your high-altitude banana bread. Get creative with different combinations of nuts, chocolate chips, spices, and dried fruits to create your signature loaf. Consider adding a streusel topping for extra sweetness and crunch, or a cream cheese glaze for a decadent finish. The only limit is your imagination! You can find more inspiration in our appetizers and snacks section for complementary flavors.
8. Serving and Storage Suggestions
Serve your high altitude banana bread recipe warm or at room temperature. It’s delicious on its own or with a pat of butter. A dollop of whipped cream or a scoop of vanilla ice cream can elevate it to a truly indulgent dessert. Store leftover bread in an airtight container at room temperature for up to 3 days or in the refrigerator for up to a week. For longer storage, slice and freeze the bread for up to 2 months. Thaw frozen slices at room temperature or in the microwave for a quick and easy treat. To make mornings easier, this banana bread for altitude can be prepared in advance and enjoyed throughout the week.
9. Conclusion
With this high altitude banana bread recipe, you can confidently bake a delicious, moist, and perfectly textured loaf, even at high elevations. You don’t have to be a professional baker to make it. By making a few key adjustments, you’ll achieve consistent results every time. Enjoy the delightful taste and texture of this altitude adjusted banana bread, and share it with friends and family! If you want to try something different for your next dinner, try our dinner ideas! Happy baking!
Print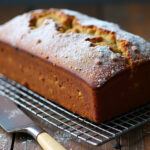
banana bread recipe high altitude
- Total Time: 75 minutes
- Yield: 1 loaf 1x
- Diet: Vegetarian
Description
This high altitude banana bread recipe is designed for perfectly moist and fluffy loaves, even at high elevations, ensuring you say goodbye to sunken centers and dry textures.
Ingredients
- 1 ½ cups all-purpose flour
- 1 teaspoon baking soda
- ½ teaspoon salt
- ½ cup (1 stick) unsalted butter, melted
- ¾ cup granulated sugar
- 2 large eggs
- 1 teaspoon vanilla extract
- 1 cup mashed ripe bananas (about 2–3 medium bananas)
- ¼ cup sour cream or plain yogurt
Instructions
- In a large bowl, combine the melted butter and sugar, mixing until smooth. Add eggs one at a time, mixing after each addition. Stir in vanilla extract and mashed bananas, then blend in sour cream or yogurt.
- In a separate bowl, whisk together flour, baking soda, and salt until well combined.
- Gradually add dry ingredients to wet ingredients, mixing until just combined; avoid overmixing.
- Pour the batter into a greased 9×5 inch loaf pan and spread evenly. Bake in a preheated oven at 350°F (175°C) for 50-60 minutes, or until a toothpick comes out clean.
- Let cool in the pan for 10 minutes, then transfer to a wire rack to cool completely.
Notes
- Reduce baking soda by ¼ teaspoon to prevent the bread from rising too quickly.
- Add an extra tablespoon of liquid to compensate for faster evaporation.
- Lower oven temperature by 25°F (15°C) for even baking.
- Don’t overmix to avoid a tough loaf; mix until just combined.
- Use ripe bananas for added flavor and moisture.
- Prep Time: 15 minutes
- Cook Time: 60 minutes
- Category: Breakfast
- Method: Baking
- Cuisine: American
Nutrition
- Serving Size: 1 slice
- Calories: 210 Kcal
- Sugar: 10g
- Sodium: 150mg
- Fat: 8g
- Saturated Fat: 4g
- Unsaturated Fat: 3g
- Trans Fat: 0g
- Carbohydrates: 31g
- Fiber: 1g
- Protein: 3g
- Cholesterol: 35mg